
A Step-By-Step Guide on How to Clean a Vape Tank
What’s the most exciting part about vaping to you?
We can’t actually hear you, but it was probably one of the following: the look and design of your vape device, the power of your vape device, the flavor of your e-juice, etc.
Somehow, “cleaning my vape” probably didn’t make the cut for that list.
That being said, knowing how to clean a vape tank is a very important part of the process.
Today, we’re going to give you a step-by-step guide on everything to do with cleaning your vape device and tank.
To Clean Your Vape Device is to Know Your Vape Device
First thing is first, you need to know what parts make up your vape device.
You’d be surprised how many people don’t research what they buy and have no idea what parts make up their tank.
There are lots of variations of devices in the wild, and it’s impossible to know exactly what kind of setup you’re working with. Still, here are a few of the more common parts of a vape setup:
- Mod
- Batteries
- Atomizer (or tank):
- Base of your tank
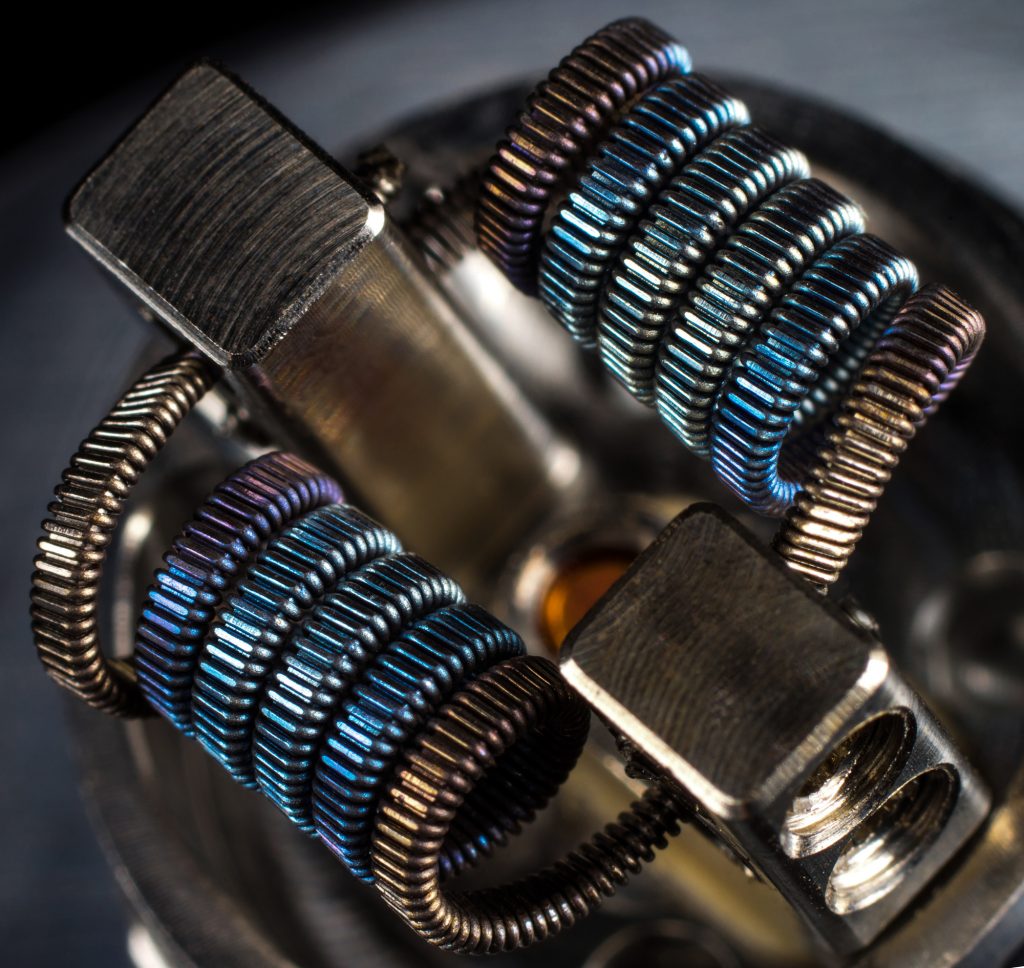
- Coil
- Glass chamber
- Tank lid (or top cap)
- Drip tip
Your exact setup may be different in some ways. For example, you may be using a rebuildable dripping atomizer (RDA), rebuildable tank atomizer (RTA), or a coil head atomizer or tank.
Whether you’re building your own coil in an RDA or an RTA or purchasing pre-made, pre-built coil heads for your tank, the cleaning process is similar.
Let’s take a look at some tell-tale clues on when to start cleaning your vape tank.
When is it Time to Clean My Vape Tank?
The easiest way to know if it’s time to start cleaning your vape tank is based on the flavor of your vape.
If your vape starts tasting burnt or the flavors are muted, then that’s a good sign that you’ve got some cleaning to do.
This can happen for a number of reasons:
- Your coil is too dirty or used up
- The cotton (or wick) is too dirty, used up, or burnt
- You’ve been using too many different flavored e-juices in a row
Sometimes, it’s because your coil or wick is simply done. Other times, it’s just because you’re using too many flavors too often.
A variety of flavors is the spice of the vaping life. There’s nothing wrong with having a lot of flavors. But so many different flavors of juices in a row can lead to them being indistinguishable from each other.
You don’t want your Vape Wild flavors like Fruit Hoops smelling or tasting like Peanut Butter Cup and Keylime Pie. Both of those things sound great on their own, but together, they might be a disaster.
Then again, who knows! They could be the surprise equivalent of peaches and tomatoes.
If you’re looking for a pure flavor of your e-juice, then let’s get into the nitty-gritty of how to clean a vape.
Guide: How to Clean a Vape Tank
If you’re excited about some new e-juice you got in the mail, you may want to clean your tank to get the smell and flavor of the old juice out.
This is especially true if you’re trying to test the new juice out to see if it clicks with you. It’s not fair to have your new juice mixing with the old stuff.
1. Take Apart Your Tank
The key here is that you need to disassemble your tank. Take a look at the parts of a vape device we discussed above.
Not only do you want to remove your tank from your mod, you also want to pull apart the different parts of your tank.
If you’re not familiar with your tank, it may be a good idea to consult an instruction manual or website the manufacturer of your vape tank may have provided.
Hopefully, they’ve detailed how to do this.
If not, you can generally do it like this:
- Remove tank (or atomizer) from the mod
- Take out the drip tip from the top cap
- Unscrew the top cap from the glass or plastic chamber
- Carefully set aside glass or plastic chamber
- Remove coil and cotton
The point is you want everything separated so that you can clean the parts individually.
2. Examine Your Coil and Wick
This is important because the cleanliness of your tank may actually not be the issue.
As discussed before, if your coil or wick are burnt out or used up, then you may need to replace them.
Look for burnt cotton in the form of a blackened or brown color or the accumulation of gunk on your coil. This will also appear to be black, brown, or some other dark color and seem goopy or flakey.
3. Wash and Clean Those Parts
Generally, water will do just fine.
You can fill a bowl up with warm water and wash the parts in there or just run the parts under a tap.
Use a cloth to scrub away at any excess e-juice or gunk that as accumulated.
In some cases, you may want to use dish soap or 91-percent isopropyl alcohol to clean the parts. This is good for getting at tanks that are especially dirty or have been neglected for too long.
The IMPORTANT thing to remember here is that if you are using dish soap or alcohol, be sure to RINSE AND DRY THOROUGHLY.
4. Dry Completely
When all is said and done, you just need to let the parts air dry separately and on their own for about 15 minutes to half an hour.
You can rest them on a paper towel or regular towel to collect any dripping water, too.
5. Reassemble Your Tank
From there, feel free to put your tank back together, fill it up with your new e-liquid, and go!
If you’re still unfamiliar with your device, make sure to pay attention to the disassembly phase. You’ll want to remember how you took it apart so you can put it back together correctly.
An Important Consideration
As a final note, battery safety is a hot topic in the vaping world.
If you’re wondering how to clean a vape tank, just make sure above all else that you take the tank off the mod and clean it away from where the batteries are.
You don’t want to get water, soap, alcohol, or anything else on your mod (which may have delicate electronic screens) or on your batteries.
Vaping From a Clean Tank
If you’ve been wondering how to clean a vape tank after you started getting messy and muddled flavors, hopefully, this guide helped you out.
From here, if you’d like to read more tips and advice on vaping, check out our reviews of some starter kits!

Leave a Reply
Want to join the discussion?Feel free to contribute!